2024-09-15 23:46
Status:complete
Tags: Creating-drupal-project
Drupal: Structure and it’s Content Types
Subject: Content Management System
Structures
Drupal’s Structure defines how your website is organized. It has various tools that allow you to manage the layout, functionality, and behaviour of the website.
graph TD;
    A[Drupal Structure] --> B[Blocks] --> bb[reausable piece of content.]
    A --> C[Content Types] --> cc[blueprints that define how specific content is structured.]
    A --> D[Menus] --> dd[navigation structures for users to browse the site.]
    A --> E[Schema] -->ee[manage database schemea for the website.]
    A --> F[Taxonomy] --> ff[categorization system to organize your content.]
    A --> G[Views] --> gg[tool for creating lists of dynamic content.]
Content Types
In Content types we have these 3 present
Aricleis by-default present when we install drupal.Basic pageis a static-page for pages like:About us.- We, have
Webformpresent as we installedWebform modules.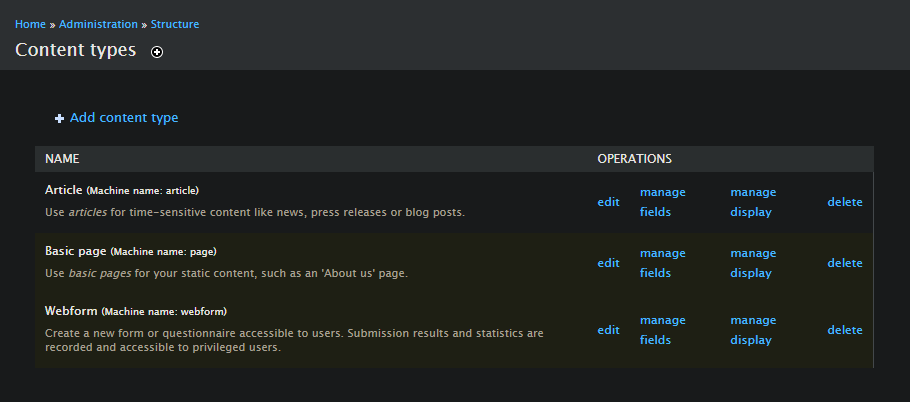
Let’s edit some content type:
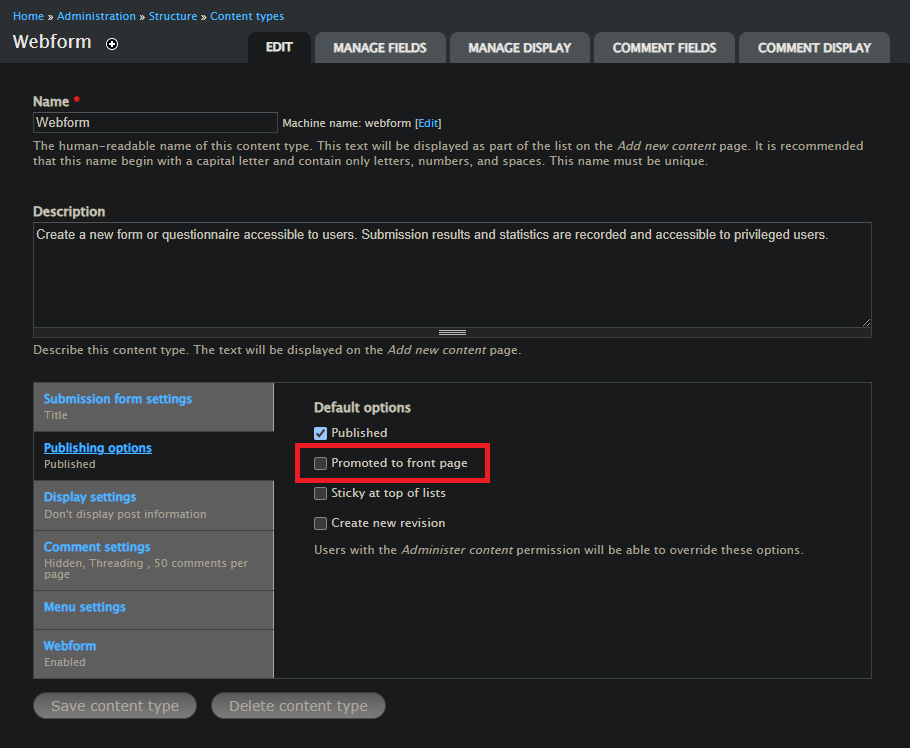
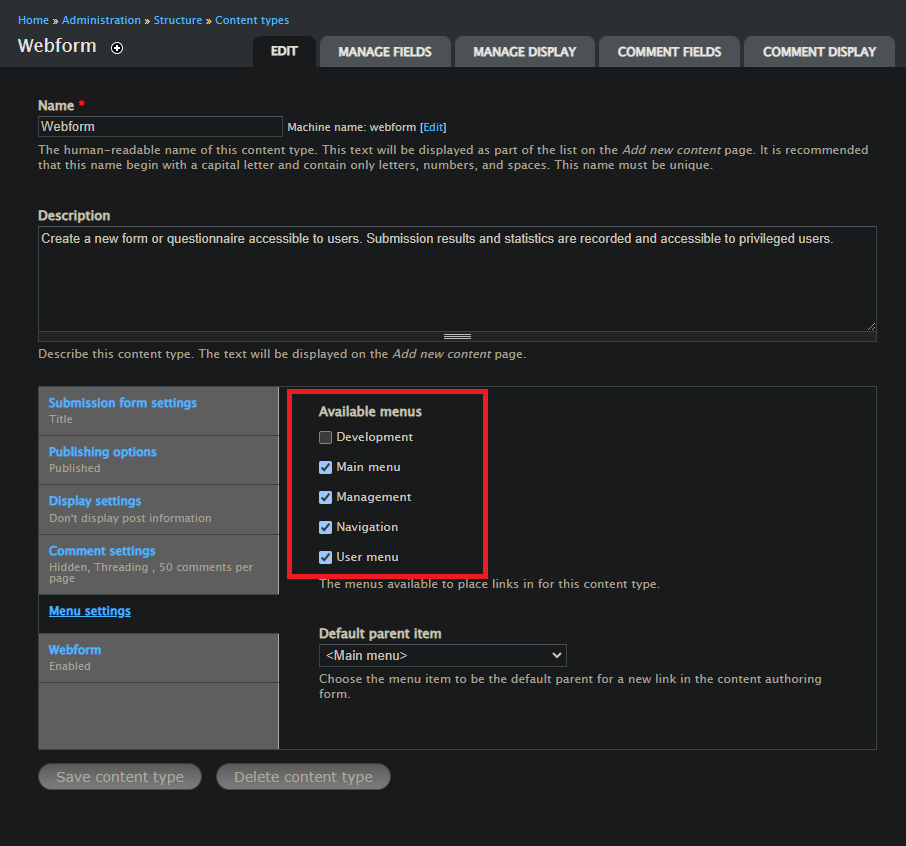
Structures\Content type: Webform
let’s uncheck some settings to make our website look professional.
- 1st is on second setting “Publishing options” We do not wish to push everything on the front page, so let’s disable that.
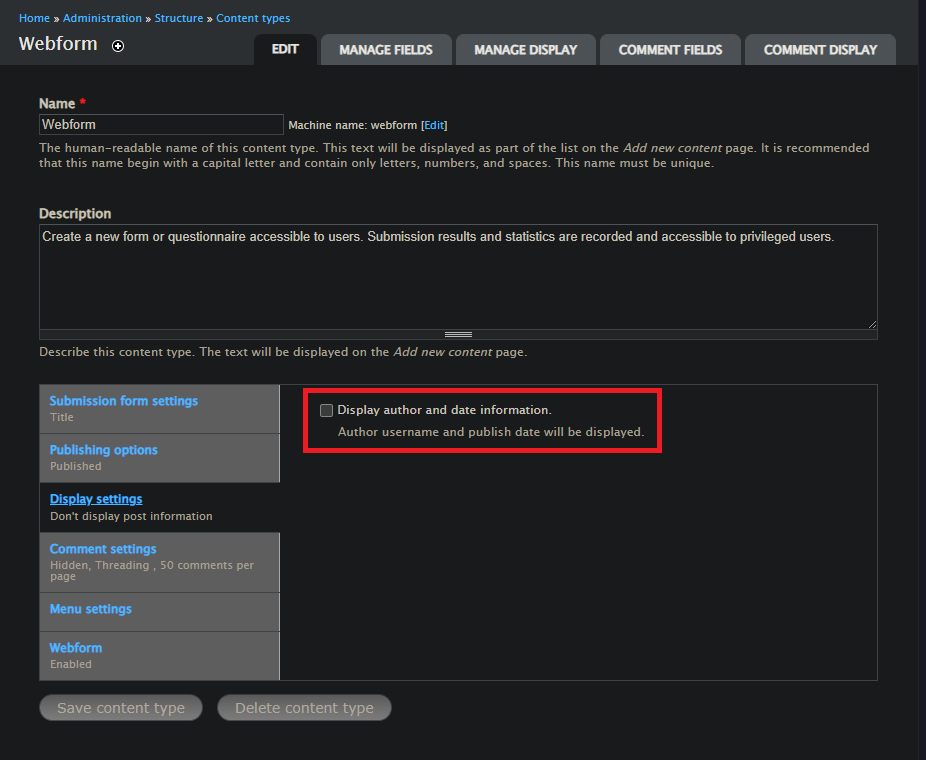
- 2nd let’s move on to third setting “Display setting” and disable
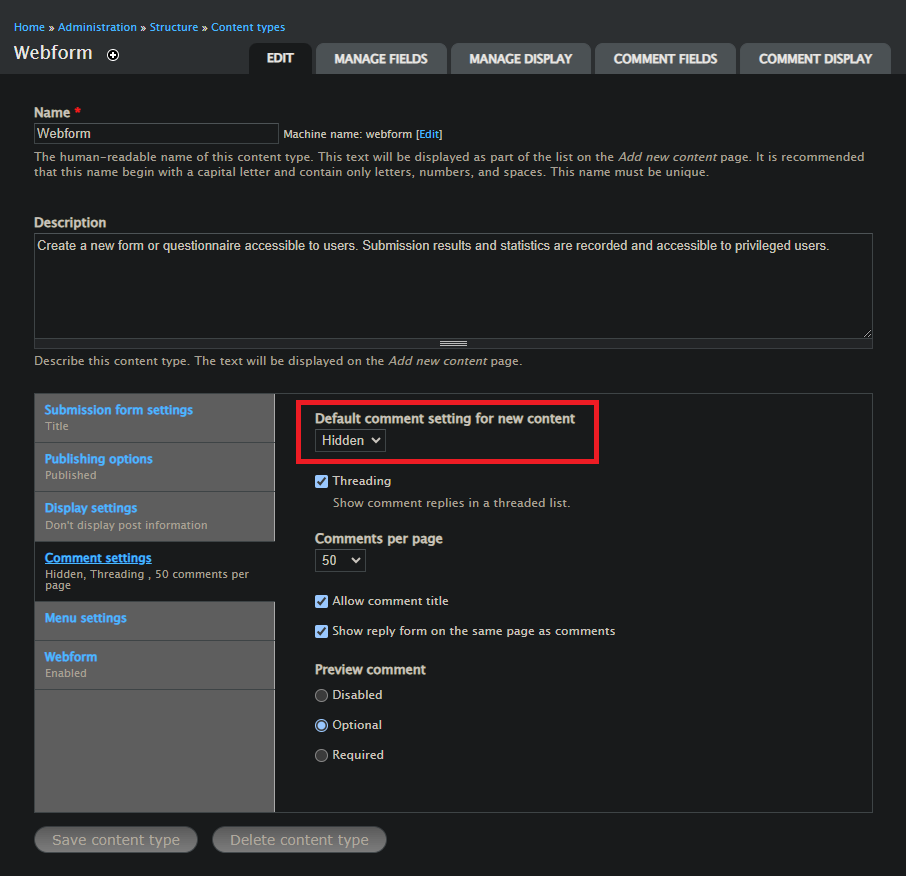
Display author and date information. - 3rd The forth setting “Comment settings” and we are going to Hide the comments.
- 4th And finally “Menu settings” where we are going to enable following and then we finally click on
Save content typebutton to save all the settings.
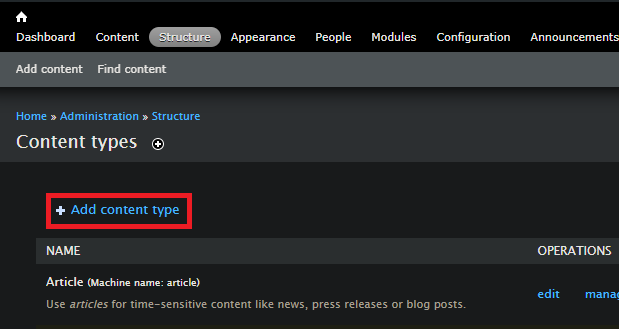
Structures\Content type: Custom content type
Let’s create our own Custom content type.
- Step 1: Go on
Structuretab and thenContent types. - Step 2: Press
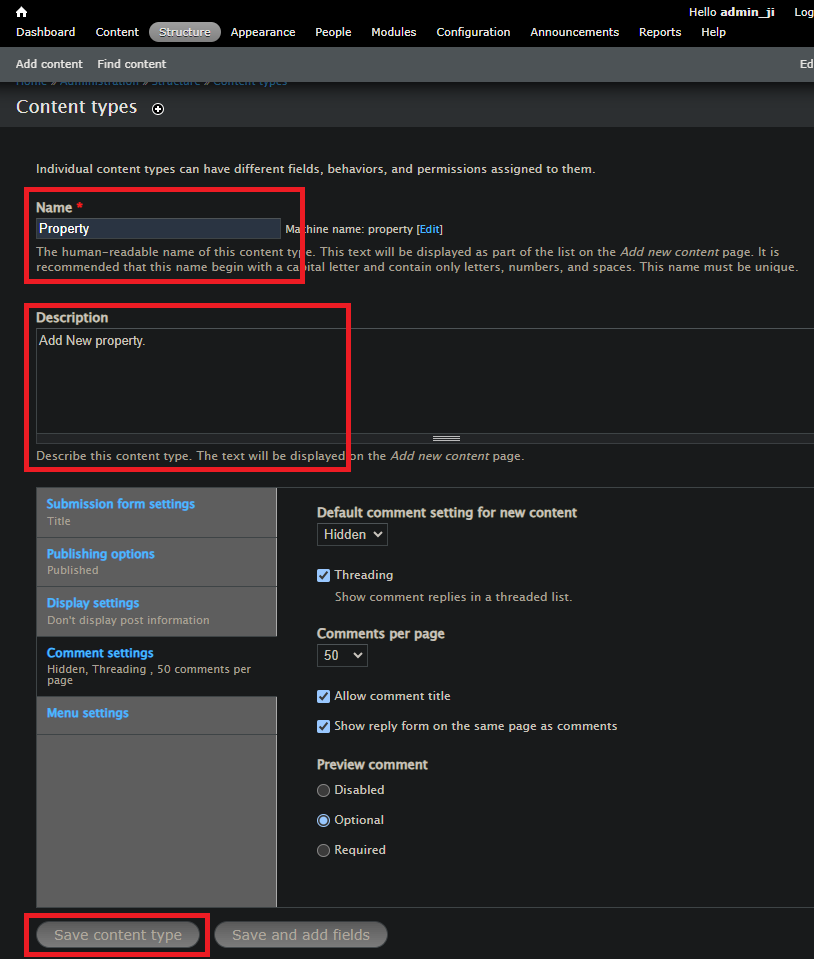
Add content types - Step 3: Add your Content type name, description, etc…and I will also disable things such as
- in Publishing options:
Promoted to front page - in Display settings:
Display author and date information. - in Comment settings:
Default comment setting for new content: Hidden. After applying settings by pressingSave content typebutton.
- in Publishing options:
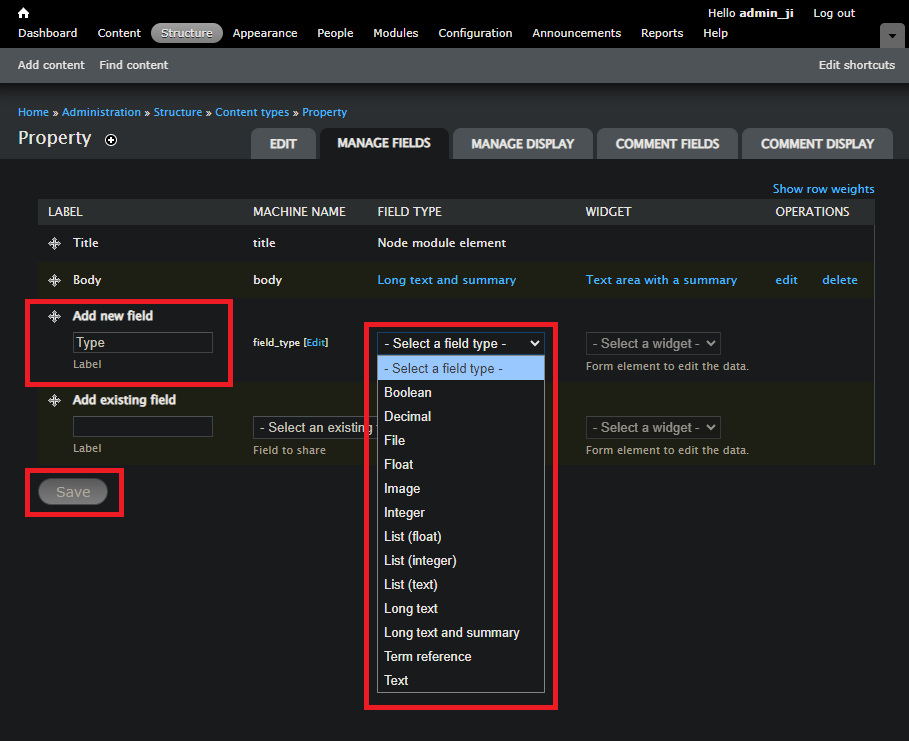
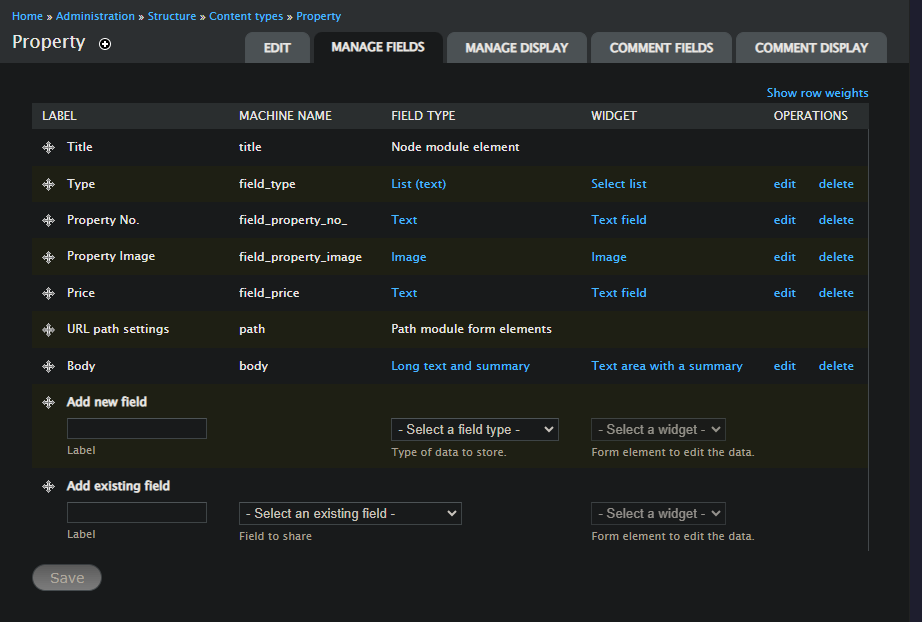
Now, we are going to manage it’s field by clicking on Manage Fields button and add it’s properties regardingly for ex: Title and Body will be present by default, and as I am creating a Component for “Property” I will input the properties needed for the ‘Property’
- Title of the Property (already present by default.)
- Description (again already present by default as
Body.) - Property Type (This could be a list like i. House, ii. Apartment, iii. Villa, iv. Unit, etc…)
- Property Number (There should be a distinction of one property with other so we can add this, which can be used as Primary key later on.)
- Images (Images are very important.)
- and finally Price. I will show you how to add one property so that you can understand, how it’s done and you can do others accordingly.
Structures\Content type\Custom content type: Properties
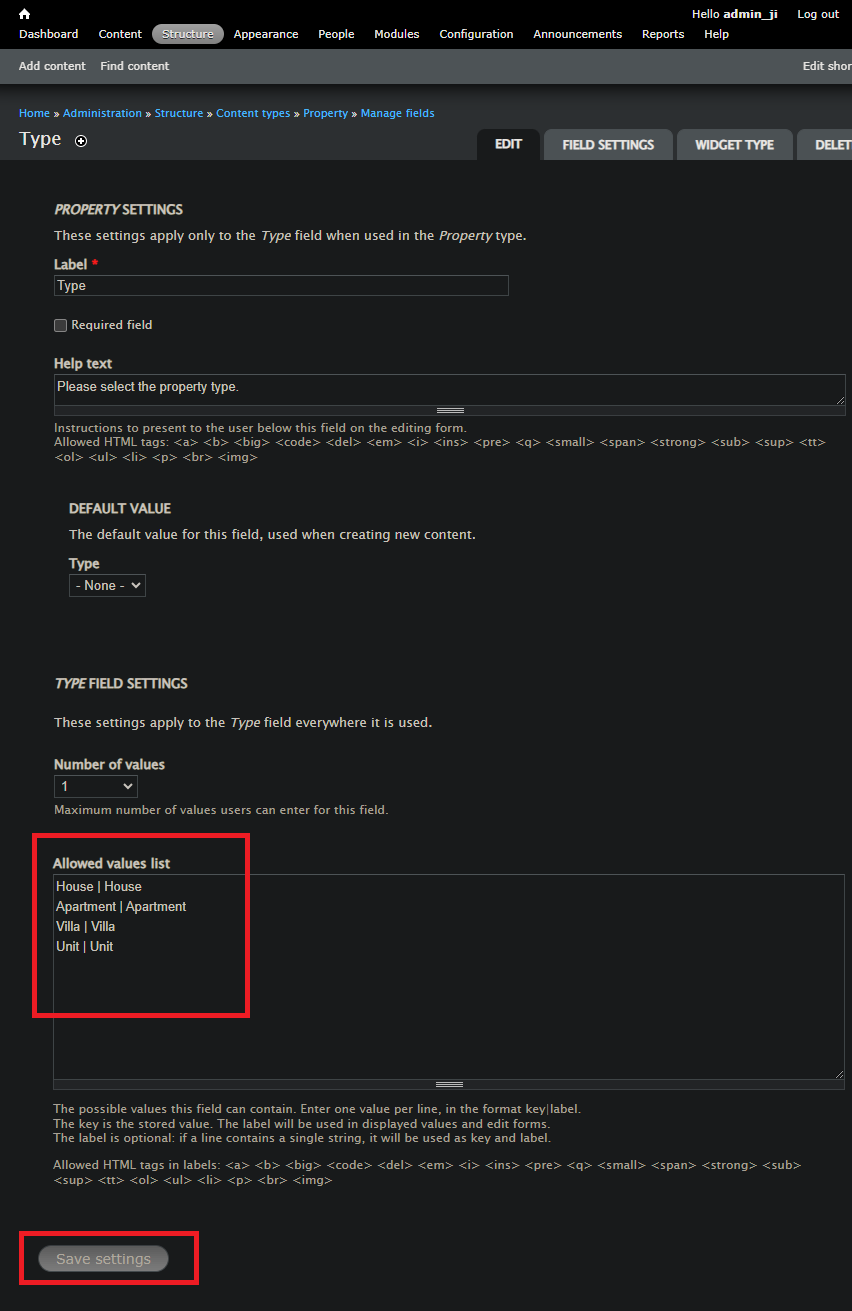
- Step 1: Select your Content type in my case it’s
Propertyand click onmanage fieldsbutton. - Step 2: Input your
field namein my case it’s for Properties Type so it will beTypeandField Typewill beList (text)as I need users to choose from a specific list, you can play around with differentfield typesaccording to your need.
- Step 3: As this a list I will need to write
Allowed values in this format. After doing this scroll down a bit and click onSave settingsbutton.
xyz | xyz
abd | abd
O.O | O.O
 Now you have learnt how to add your own custom fields to the content types, I have gone ahead and added all my fields necessary for my project:
Structures\Blocks
This section isn’t necessary but if you wish to create a professional looking website then yup it’s indeed very helpful.
In Blocks section we need to disable two things (you can enable them later if you wish to use them we are going to replace them with our own one.)
- Search form
- and
User loginwhich is not needed for our use-case and if you are thinking how will we access to login page of the website then? then you can access the login page by visitinghttp://localhost/YOUR-PROJECT-NAME/user. ![[drupal-blocks.png]] after selecting- None -in both of the settings scroll down and click onSave blocks` to save the settings.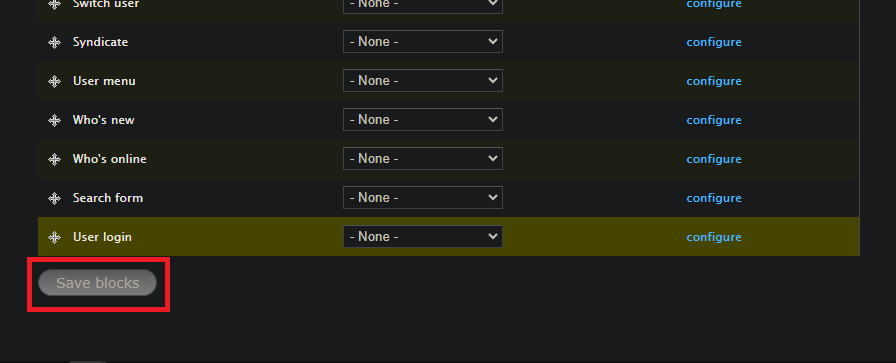
Adding Content
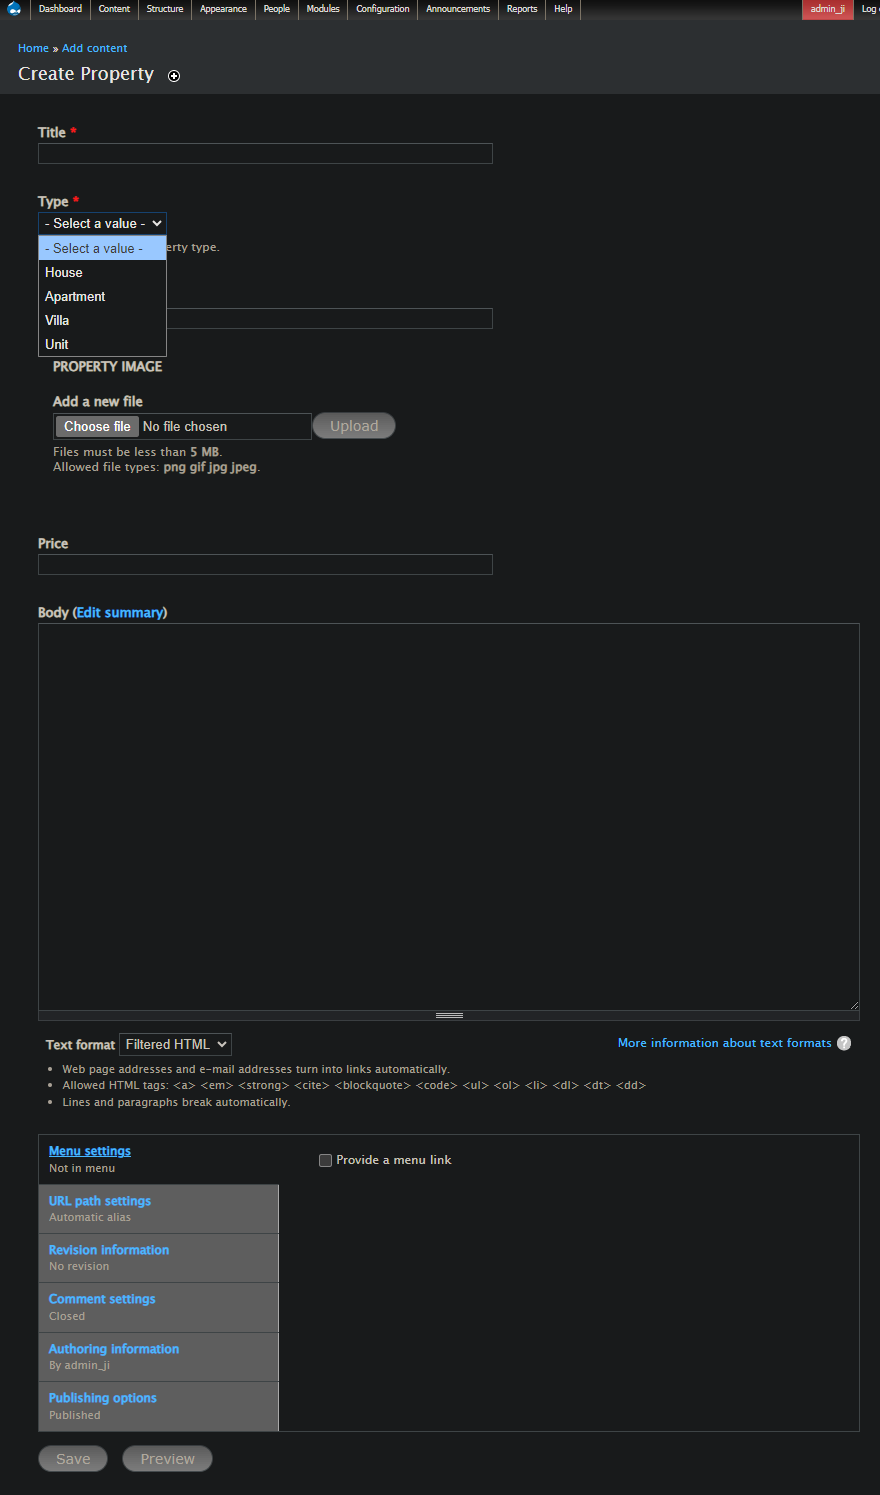
As we have added our custom content type and added manage files to them as well let’s try and create a Content to see how it looks, It might look funky for now but don’t worry will make changes to it soon ;)
To create your Content first we need to go to Content tab then look for our Custom content name that we created earlier, in my case it’s Property. ![[drupal-content.png]]Then fill all the details (as per what you filled in the manage filedspreviously) and then you canPreviewyour content and publish by clicking onSave` button.
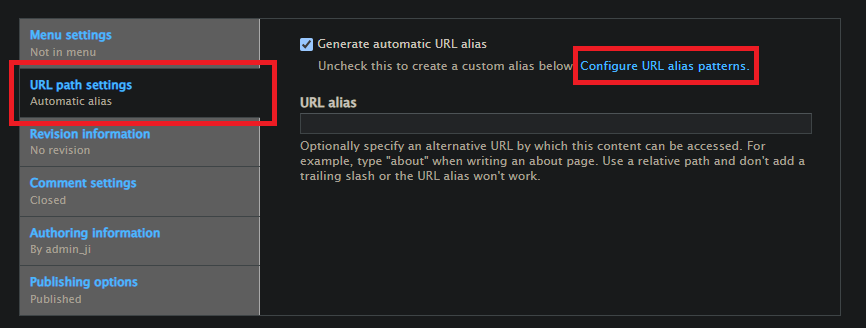
Oh, I didn’t talk about URL path settings hmm… let’s discuss that
Content: Custom URL
Let’s organise our URL’s so that it’s not gibberish dynamically, to do that we will need to go to Configure URL alias patterns which can be found in URL path settings option.
- Step 1: Click on
URL path settingsoption thenConfigure URL alias patternsbutton. - Step 2: It should take you to
URL aliasespage, and that will look something like this:- I have already configured my
urlsass you can see,- Default path pattern is
content/[node:title](node:titleis nothing but the tile of the file and first content is like this:http://localhost/YOUR-PROJECT-NAME/content/TITLE.) - Article path is in
news/[node:title]sohttp://localhost/YOUR-PROJECT-NAME/article/TITLE. - and so on…You can put the url’s according to your project

- Default path pattern is
- I have already configured my
Now, let’s view our Content that we just created (I have used a dummy data from this website)
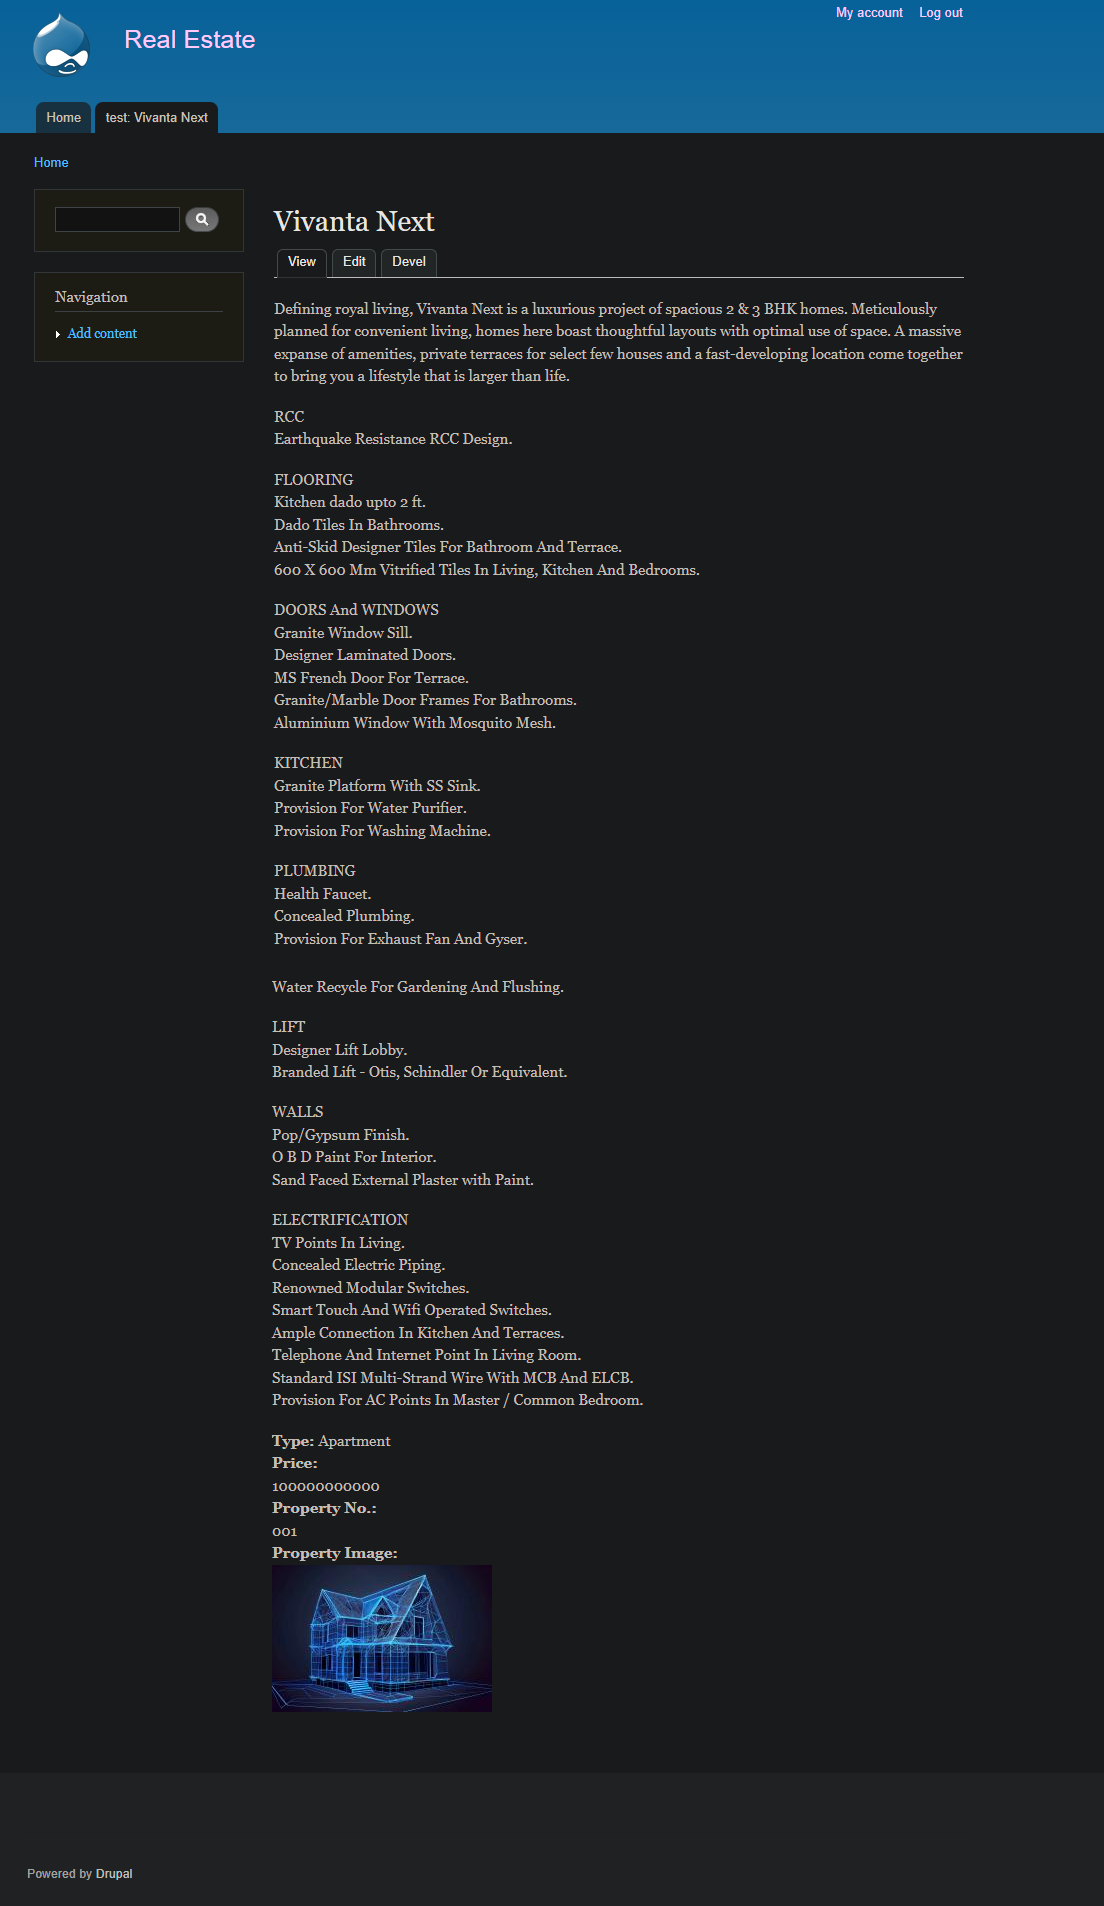
YaYY :D I know it doesn’t look beautiful ;-; we will first focus on implementing all the FUNctuanlities ;-; not really fun but it is what it is ;-;
Now. Let’s move on to setting up our website’s User Role and stuff.